4. Installing and Starting Zope
Attention
This document was written for Zope 2.
By the end of this chapter, you should be able to install and start Zope. It is fairly easy to install Zope on most platforms, and it typically takes no longer than ten minutes to complete an installation.
4.1. Downloading Zope
There are typically two types of Zope releases: a “stable” release and a “development” release. If you are new to Zope, you almost certainly want to use the “stable” Zope release.
Zope is published on the official Python package repository at https://pypi.org/project/Zope/.
Zope comes as a “binary” release for the Windows platform, and in source format for UNIX-like operating systems. Zope may be compiled on almost any UNIX-like operating system. Zope has reportedly been successfully compiled on Linux, FreeBSD, NetBSD, OpenBSD, Mac OS X, HPUX, IRIX, DEC OFS/1, and even Cygwin (the UNIX emulation platform for Windows).
As a general rule of thumb: if Python is available for your operating system, and if you have a C compiler and associated development utilities, then it is highly likely that you will be able to compile Zope. A notable exception is Mac OS between versions 7 through 9, as Zope does not run at all on these platforms.
4.2. Installing Zope
Zope’s installation steps vary somewhat, depending on your operating system platform. The sections below detail installing the binary version of Zope on Windows on Intel platforms, and a source installation on Linux.
4.2.1. Installing Zope for Windows With Binaries from Zope.org
The “Win32” version of Zope works under Windows 95, Windows 98, Windows ME, Windows NT, Windows 2000, Windows XP, and Windows Server 2003. Zope for Windows comes as a self-installing .exe file. To install Zope, first, download the Win32 executable installer from the Download area on Zope.org. It is typically named something like “Zope-2.X.X-win32-x86.exe” where the “X“‘s refer to the current Zope version number.
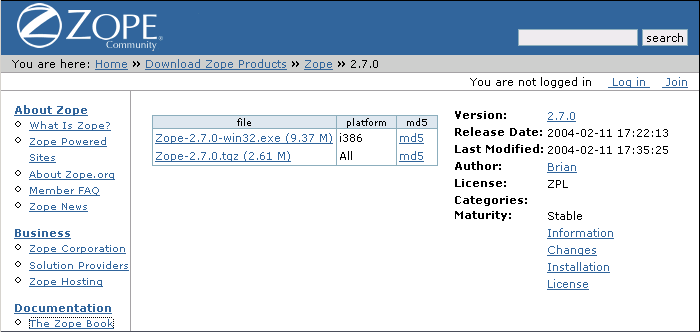
Current stable Zope release for Windows
Download the current stable release installer for Windows from Zope.org using your web browser. Place the file in a temporary directory on your hard disk or on your Desktop. Once the installer file has been downloaded, navigate to the folder into which you downloaded the file, and double-click on the file’s icon. The installer then begins to walk you through the installation process.
Zope installer
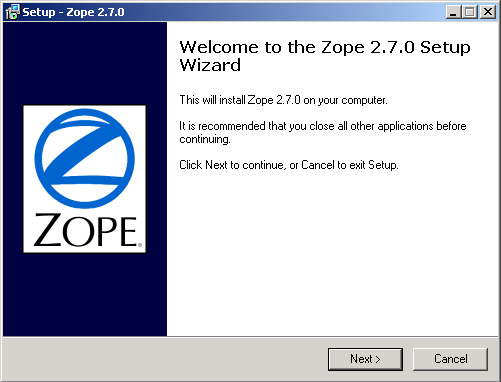
Beginning the installer
Click Next. The installer asks for an installation path. The default is usually acceptable, though you are, of course, free to choose another path. Then click Next. You then can choose which components to install.
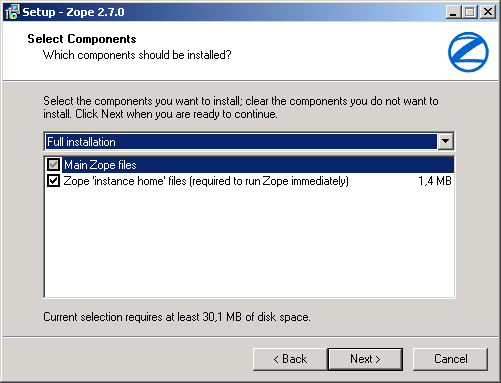
Select components
You should select “Full installation” unless you have previously installed Zope and know what you are doing. On the next screen, you may customize the entry placed in your Start Menu folder. Click Next again. The installer now asks you whether you would like to run Zope as a service, unless you are running Windows 98 or ME, on which such services are not available. If you are only running Zope for personal use, there is no need to run it as a service.
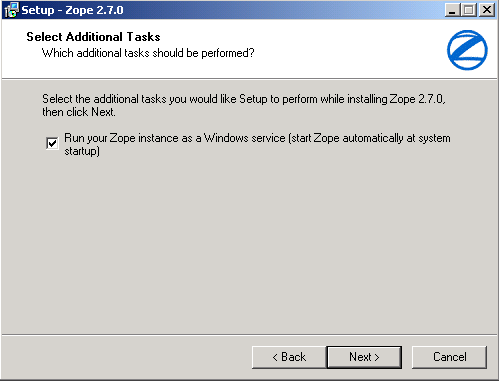
Server options
Upon clicking Next, the installer takes you to the “Instance Setup” Screen.
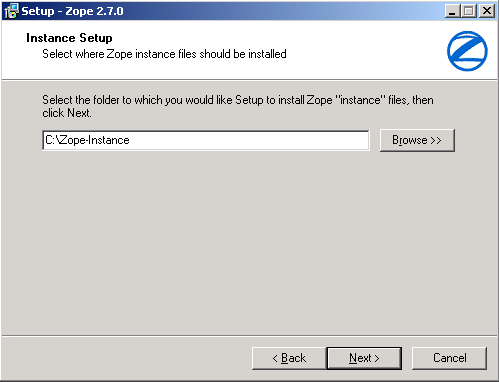
Instance setup
You can have more than one Zope running on your PC, but each has to have its own Instance Home, which is the path to specify here. This path is where Zope will later place its database files. Make sure that you have enough disk space left on the specified drive and that you can make backups easily.
The Next screen asks you for a password for an initial administrative account. You use this account to log in for the first time and create more users. Note that the installer does not ask you to verify your password, so be careful not to mis-type it.
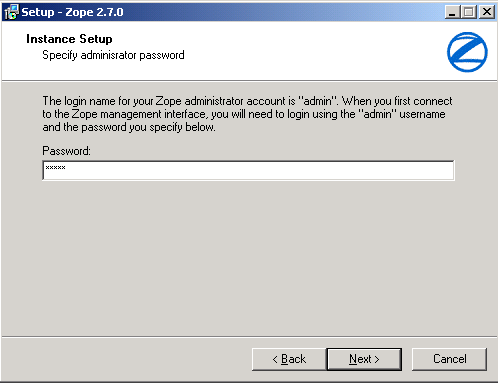
Administrative password
Click Next after entering a password. The installer presents an overview, form which you can commence installation by clicking Install. After a few moments, the Zope installer will present you with a “Completion” screen.

Installation completion
Let the installer start Zope for you, or start Zope manually by navigating to the Zope folder in the Start Menu and selecting “Run Zope in Console”. See the section below entitled Starting Zope.
4.2.2. Compiling and Installing Zope from Source Code
If binaries aren’t available for your platform, chances are good that you will be able to compile Zope from its source code. To do this, however, you first must:
ensure that you have a “C” compiler on your system (GNU gcc is preferred);
ensure that you have a recent “make” on your system (GNU make is preferred);
install the Python language on your system from source, or install a binary Python package, including development headers.
Zope is written primarily in the Python language, and Zope requires Python in order to be able to run at all. While binary versions of Zope ship with a recent Python version, the source Zope distribution does not. Zope developers try to use the most recent Python for Zope, but often the latest Python version is more recent than the officially-supported Zope version. Zope 2.12 requires Python 2.5.4 or later, and Zope versions 2.11 and 2.10 require a Python 2.4.*x* version equal to or greater than 2.4.3. For the most recent information on which version of Python is required for compiling Zope, see the release notes on the release Web page.
You can obtain detailed instructions for downloading, compiling, and installing Python from source at the Python.org website. Most Linux distributions ship with a pre-installed Python 2.5, but care is required when attempting to use a vendor-installed Python to compile Zope: some of these vendor-supplied Python distributions do not ship the necessary Python development files needed to compile Zope from source. Sometimes these development files are included in a separate “python-devel” package that may be installed separately, but sometimes they are not. The binary packages that ship with Debian have been used with some level of success, but it is generally advisable to compile and install Python from source if you wish to also compile and install Zope from source.
After downloading, compiling, and installing Python from source, download the current Zope source distribution. See the Zope.org Downloads area for the latest Zope source release.
Download the source to your home, or some other directory, ‘cd’ to that directory, and unpack it with something similar to:
$ mkdir ~/myzope
$ cd ~/myzope
$ gunzip -c /tmp/Zope-*.tgz | tar xvf -
where * represents the Zope release version of the source tarball.
Zope now uses the conventional UNIX build sequence:
configure, make, make install.
To configure Zope, ‘cd’ to the Zope directory and issue the configure command:
$ cd Zope-*
$ ./configure --prefix=/where/to/install/zope
Replace /where/to/install/zope above with an appropriate path, such as
~/myzope/zope2. This path is referred to as the ZOPE_HOME. If you
want to install Zope in a system directory instead of your user home,
replace ~/myzope/zope2 with an appropriate path, e.g.,
/usr/local/zope2, and make sure that you have suitable privileges for
installing and starting Zope (‘sudo’ or ‘root’).
If the configure script is unable to find your Python installation, it will report an error not unlike this one:
$ ./configure --prefix=~/myzope/zope2

Configuring Zope installation
Testing for an acceptable Python interpreter...

No suitable Python version found. You should install
Python version 2.5.4 before continuing. Versions
2.6.1 2.6.0 also work, but not as optimally.
In this case, you must point the installer to your Python interpreter, which you should have installed previously, either from a binary package or compiled from source.
Use the --with-python option to the configure script, e.g,. for a python
living under /usr/local
$ ./configure --prefix=~/myzope/zope2 \
--with-python=/usr/local/bin/python
Replace /usr/local/bin/python with the path to your Python executable.
Zope is now ready to be built. From within the source directory, issue:
$ make
[ lots of output snipped ]
Zope built. Next, do 'make install' (or 'make instance'
to run a Zope instance directly from the build directory).
You are now ready to install Zope. To do this, you will have to execute ‘make install’
$ make install
[ lots of output snipped ]
Zope binaries installed successfully.
Now run '~/myzope/zope2/bin/mkzopeinstance.py'
With the Zope binaries installed, you are now ready to create a Zope instance, which holds configuration and runtime data for a single Zope server process. This helps keep your own or third-party software separate from the main Zope source.
Assuming that you want to install a Zope instance in the directory
~/myzope/instance, in order to create a Zope instance, you would run
the following command:
$ ~/myzope/zope2/bin/mkzopeinstance.py
You will need to provide the following values:
The directory where your instance should be located, or the INSTANCE_HOME. The instance home will hold your database files, log files, configuration files, and scripts to start and stop the instance. For our example, we assume the instance home to be located at
~/myzope/instance.Username and Password for an initial Zope user. You will log in with this username and password to create your own Zope users. To change the username or password for your initial Zope user, run:
$ cd ~/myzope/instance
$ ~/myzope/zope2/bin/zpasswd.py inituser
You will have to provide the username and password you wish to set; optionally, you can specify the hashing method and an additional domain restriction.
Zope installation is now complete. Read on to see how to start your brand-new Zope.
4.3. Starting Zope
Zope is managed via a web browser, and Zope contains its own web server
(called ZServer). A successful Zope startup implies that Zope’s web
server starts, which allows you to access the Zope management interface
(ZMI) via your web browser. You can access the ZMI from the same machine
on which Zope runs, or you can access it from a remote machine that is
connected to the same network as your Zope server.
Zope’s ZServer will “listen” for HTTP requests on TCP port 8080. If your Zope instance fails to start, make sure that another application isn’t already running on the same TCP port (8080).
Zope also has the capability to listen on other TCP ports. Zope supports separate TCP ports for FTP (File Transfer Protocol), “monitor” (internal debugging), WebDAV (Web Distributed Authoring and Versioning), and ICP (Internet Cache Protocol) access. If you see messages that indicate that Zope is listening on ports other than the default 8080 HTTP, don’t panic: it’s likely just one of these additional ports.
4.4. Using Zope With an Existing Web Server
If you wish, you can configure your existing web server to serve Zope content. Zope interfaces with Microsoft IIS, Apache, and other popular webservers.
The Virtual Hosting Services <VirtualHosting.html> chapter of this book provides rudimentary setup information for configuring Zope behind Apache. However, configuring Zope for use behind an existing web server can be a complicated task, and there is more than one way to get it done. Here are some additional resources that should get you started:
IIS: see brianh’s HowTo on using IIS with Zope. Also of interest may be the
WEBSERVER.txtfile in your Zope installation’sdocdirectory, and hiperlogica’s Connecting IIS to Zope article.
If you are just getting started with Zope, note that it is not necessary to configure Apache, IIS, or any other web server to serve your Zope pages, as Zope comes with its own web server. You typically only need to configure your existing web server if you want to use it to serve Zope pages in a production environment.
4.5. Starting Zope on Windows
If you’ve installed Zope to “run manually” (as opposed to installing Zope as a “service”), navigate to the Zope folder in your Start Menu and click on Run Zope in Console. A console window with process startup information will be displayed.
If you chose to run Zope as a “service” on Windows NT/2000/XP, you can start Zope via the standard Windows “Services” control panel application. A Zope instance started as a service writes events to the standard Windows Event Log; you can keep track of the Zope service’s start and stop events by reviewing the Event Log. A Zope instance which has been installed as a “service” can also be run manually by invoking the Run Zope in Console menu entry as described earlier. Take care not to run Zope manually and as a service at one time: make sure to stop the Zope service first before starting it manually.
4.6. Starting Zope on UNIX
To start your Zope instance (which we assume lives in ~/myzope/instance),
issue the command:
$ ~/myzope/instance/bin/zopectl start
This will start the instance in the background. Alternatively, you can start it in the foreground and watch its progress by issuing the command:
$ ~/myzope/instance/bin/zopectl fg
Run the zopectl script with a parameter of help to get a
list of additional commands:
$ ~/myzope/instance/bin/zopectl help
4.6.1. Starting Zope as the Root User
ZServer (Zope’s server) supports setuid() on POSIX systems in order
to be able to listen on low-numbered ports, such as 21 (FTP) and 80 (HTTP),
but drop root privileges when running; on most POSIX systems, only the
root user can do this.
The most important thing to remember about this support is that you don’t
have to start ZServer as root, unless you want to listen for requests on
“low” ports. In fact, if you don’t have this need, you are much better off
just starting ZServer as a user account dedicated to running Zope.
‘nobody’ is not a good idea for this user account, because if any other
daemon on a system that ran as nobody were to be compromised, this would
open up your Zope object data to vulnerability.
If you do need to have ZServer listening on low ports, you will need to
start zopectl as the root user, and to specify what user ZServer
should setuid() to. This can be done by setting the effective-user
parameter in your Zope instances configuration file, residing in
$INSTANCE_HOME/etc/zope.conf, and by making sure that the log and
database files are writeable by this user.
4.7. Your Zope Installation
To use and manage Zope, you will need a web browser. Start a web browser on the same machine on which you installed Zope, and browse to the URL http://localhost:8080/.
If your Zope instance has been properly installed, and you’re visiting the correct URL, you will be presented with the Zope “QuickStart” screen.
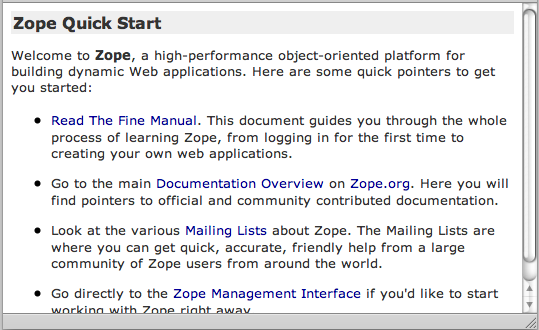
Zope QuickStart
If you see this screen, congratulations! You’ve installed Zope successfully. If you don’t, see the Troubleshooting and Caveats section below.
4.8. Logging In
For some of the tasks you want to do with Zope, you need to use its management interface: the ZMI. To log into the ZMI, use your web browser to navigate to Zope’s management URL. Assuming you have Zope installed on the same machine from which you are running your web browser, the Zope management URL will be http://localhost:8080/manage.
Successful contact with Zope via this URL will result in an authentication dialog, into which you can enter the “initial” username and password you chose when you installed Zope. You will then be presented with the ZMI.
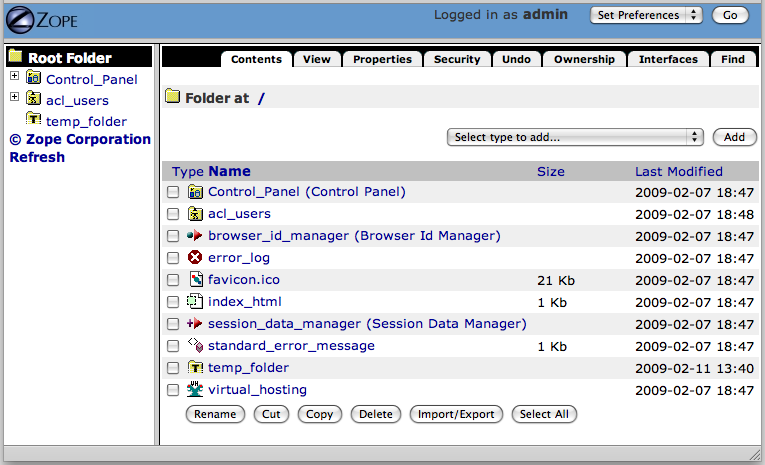
The Zope Management Interface (ZMI)
If you do not see an authentication dialog and the ZMI, refer to the Troubleshooting and Caveats section of this chapter.
4.9. Controlling the Zope Process with the Control Panel
When you are using the ZMI, you can use the Zope Control Panel to control the Zope process. Find and click the Control_Panel object in ZMI.
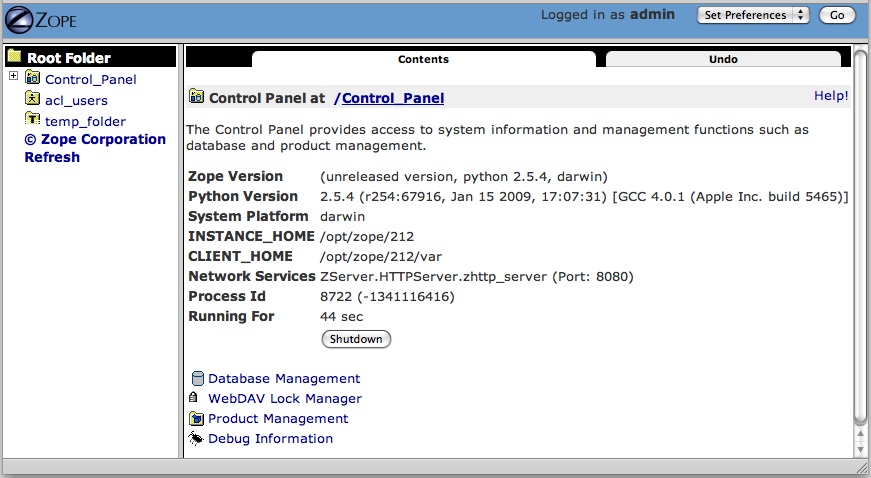
The Control Panel
The Control Panel displays information about your Zope, such as the Zope version you are running, the Python version that Zope is using, the system platform, the INSTANCE_HOME, the CLIENT_HOME, Zope’s process id, the network services that have been started, how long Zope has been running for, and other installation specifics. Several buttons and links will also be shown.
If you are running Zope on UNIX or as a service on Windows, you will see a Restart button in the Control Panel. Clicking Restart will cause Zope to shut down and then immediately start back up again. It may take Zope a few seconds to come back up and start handling requests. You don’t need to shut your web browser down and restart it to resume using Zope after pressing Restart, as the page refreshes automatically; just wait for the Control Panel display to reappear.
To shut Zope down from the ZMI, click Shutdown. Shutting Zope down will cause the server to stop handling requests and exit. You will have to manually start Zope to resume using it. Shut Zope down only if you are finished using it and you have the ability to access the server on which Zope is running, so that you can manually restart it later as needed.
4.10. Controlling the Zope Process from the Command Line
If you started Zope in the foreground, press “Ctrl+C” in the terminal window from which you started Zope.
If you started Zope in the background, use the
zopectlscript:$ ~/myzope/instance/bin/zopectl stop
On Unix use the “kill” command against the process id in the “var/Z2.pid” file inside the Zope instance directory:
$ kill `cat var/Z2.pid`
4.11. Customizing your Zope instance
Zope’s configuration is done via the file ‘$INSTANCE_HOME/etc/zope.conf’. This contains numerous configuration directives for customization.
The zope.conf file features extensive inline documentation, which we
will not reproduce here. Instead, we will give an overview and some
additional hints for the most-widely used directives:
4.11.1. Server stanzas and port-base
The port-base directive, together with stanzas for the individual
servers, determine the ports on which specific servers listen for incoming
Zope requests. The stanzas are formed with XML-like constructs:
<http-server>
  # valid keys are "address" and "force-connection-close"
  address 8080
</http-server>
<ftp-server>
  ...
</ftp-server>
<webdav-source-server>
  ...
</webdav-source-server>
The address directive determines the port on which the respective server
listens. The HTTP Server in this example listens on port 8080.
The port-base directive comes in handy if you want to run several Zope
instances on one machine. port-base specifies an offset to the port on
which all servers listen. Let us assume that our HTTP Server’s
‘address’ directive is set to 8080, as in our example above, and
‘port-base’ is specified as 1000. The port on which the HTTP server will
listen, will be the address value of 8080, plus the port-base offset
value of 1000, or 9080. Assuming the FTP server’s address directive is
set to 8021, the FTP Server will then listen on port 9021, and so on.
4.11.2. The debug-mode directive
This directive is a switch, specified as either on or off. When
set to on (the default), Zope runs in debug mode, which causes Zope
to reload file system-based templates, and several other settings suitable
for development, in real time. In a production environment, to reduce
unnecessary overhead, you should ensure that this directive is set to
off unless you are actively troubleshooting a problem.
4.11.3. Switch the User the Zope process runs as: effective-user
This directive causes Zope to setuid(2) to the specified user when run
as root on a UNIX system. This method boosts system security, as a
compromised Zope instance would not enable a compromised user to damage
easily an entire system. One motivation for running Zope as root in the
first place is to be able to bind to privileged ports, or ports with
values below 1024.
4.11.4. Logging
Three log facilities are provided:
Access logging logs individual HTTP Requests in a common format, by default to the file
log/Z2.login your instance home.Event logging logs Zope events, such as start and stop information and debugging messages.
Trace logging logs detailed Zope debugging information.
Each log message has an associated severity level, ranging from
CRITICAL, ERROR, WARN, and INFO, to DEBUG and ALL.
You can specify a filter for log messages with the level directive
inside a logger stanza. Set the level to ALL to get all log messages,
or to ERROR or CRITICAL to see only the most serious messages.
Although the default is to write the messages to a log file, you can
instead arrange for log messages to be mailed to you, or to go to
syslog(3) (on UNIX) or the event log (on MS Windows)
For further documentation, see the inline comments in zope.conf.
4.12. Troubleshooting and Caveats
4.12.1. Browser cannot connect to port 8080
If your browser fails to connect with anything on TCP port 8080, your Zope
instance may be running on a non-standard TCP port (for example, some
versions of Debian Linux ship with Zope’s default TCP port as 9673). To
find out exactly which URL to use, look at the logging information Zope
prints as it starts up when started in the foreground, i.e., when started
with ./runzope or ./zopectl fg. For example:
...
------
2009-01-21T21:48:27 INFO(0) ZServer HTTP server started at Wed Jan 21 21:48:27 2009
Hostname: arod
Port: 9673
------
2009-01-21T21:48:27 INFO(0) ZServer FTP server started at Wed Jan 21 21:48:27 2009
Hostname: arod
Port: 8021
...
The first log entry indicates that Zope’s web server is listening on port
9673 on host arod. This means that the management URL is
http://arod:9673/manage.
As mentioned previously, Zope only prints to the console when started in
the foreground, with ./runzope or runzope.bat. This logging
information can be found in the log/event.log file in your
INSTANCE_HOME directory.
4.12.2. Forgot administrative password
If you forget or lose your initial Zope user name and password, shut Zope down, change the initial user password with the zpasswd.py script, and restart Zope. See the chapter entitled Users and Security for more information about configuring the initial user account.
4.12.3. When All Else Fails
If there’s a problem with your installation that you just cannot solve, do
not despair. You have many places to turn for help, including the Zope
mailing lists and the #zope IRC channel.
If you are new to open-source software, please realize that, for the most part, participants in the various “free” Zope support forums are volunteers. Though they are typically friendly and helpful, they are not obligated to answer your questions. Therefore, it’s in your own self-interest to exercise your best manners in these forums in order to get your problem resolved quickly.
The most reliable way to get installation help is to send a message to the general Zope mailing list detailing your installation problem. For more information on the available Zope mailing lists, see the Resources section of Zope.org. Typically, someone on the “zope@zope.dev” list will be willing and able to help you solve the problem.
Another resource is the Zope section on the Plone community discussion server at https://community.plone.org/c/zope because Plone is running on top of Zope, so you will find many knowledgeable people there.
For even more immediate help, you may choose to visit the #zope channel on the IRC (Internet Relay Chat) network. See the Freenode website for more information on how to connect to the FreeNode IRC network.